Clawhammer banjo is a unique style of banjo playing that originated in the Appalachian region of the United States. It’s characterized by its use of a downward striking motion with the back of the fingernail, creating a distinctive rhythmic sound. If you’re interested in learning how to play clawhammer banjo, this article will provide you with a comprehensive guide on the basic right hand technique.
Check out our Free Banjo Tabs resource.

Basic Right Hand Technique for Clawhammer Banjo
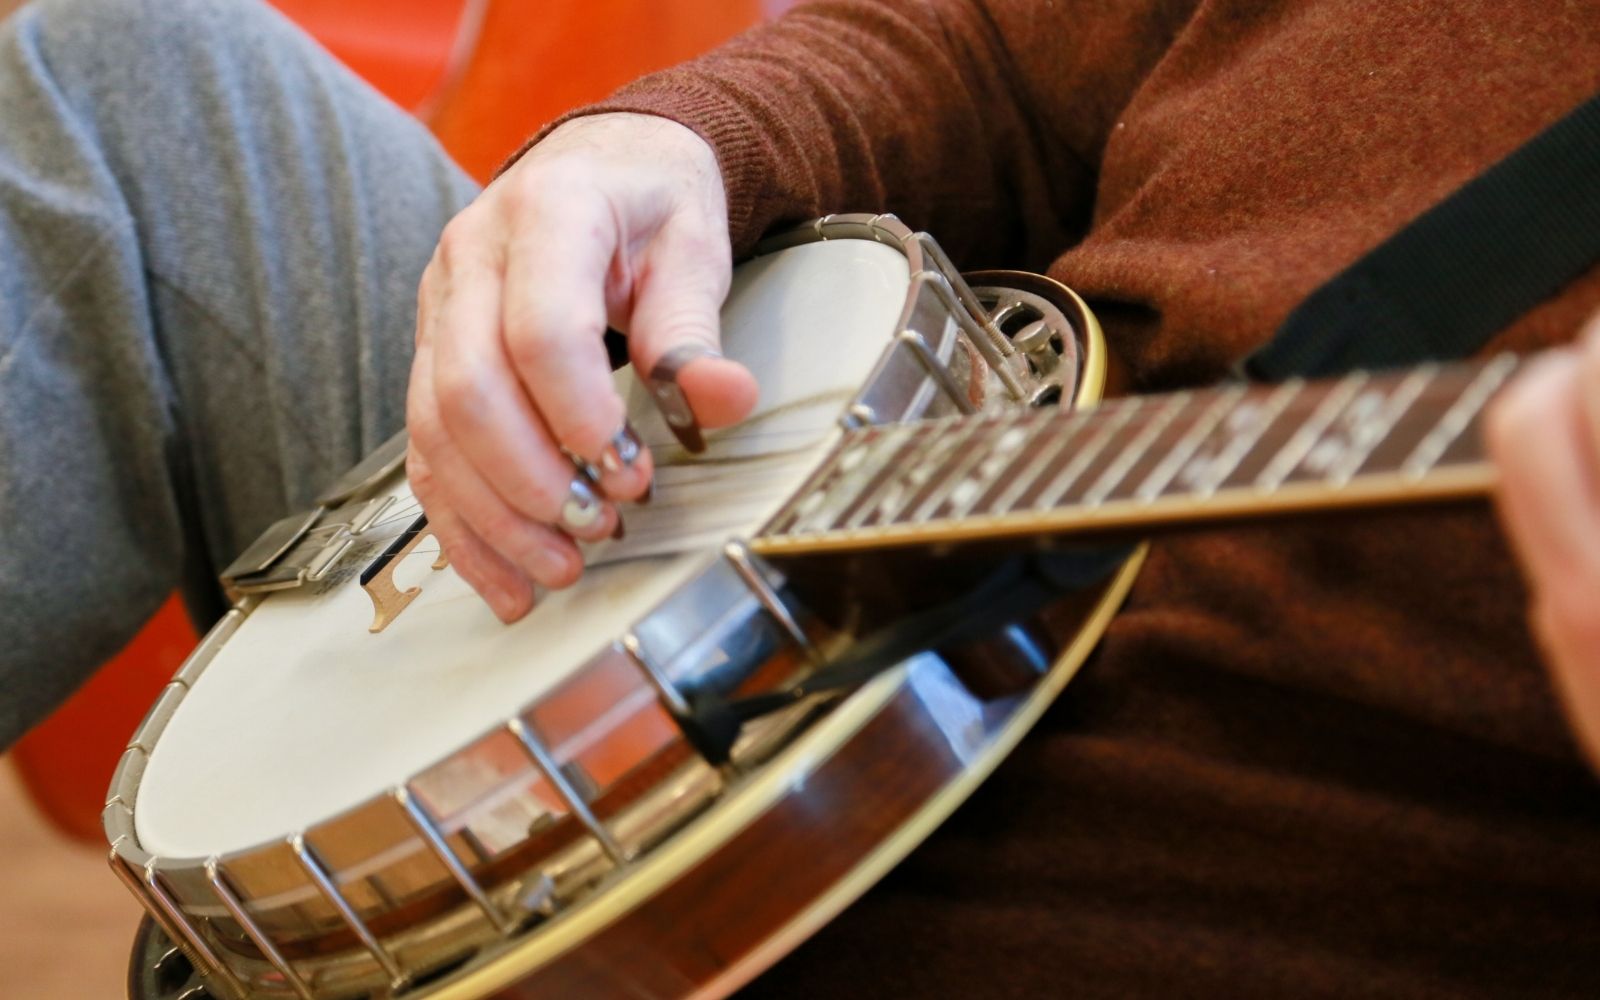
Step 1: Positioning Your Hand The first step in learning basic right hand technique for clawhammer banjo is to position your hand correctly. The hand should be slightly angled and relaxed with the wrist straight. Your thumb should rest on top of the banjo head and your fingers should rest on the strings, with your middle finger on the second string and your index finger on the first string.
Step 2: Striking the Strings Once you’ve positioned your hand correctly, it’s time to start striking the strings. The back of your fingernail should be used to strike the strings with a downward motion. This motion should come from your wrist, not your arm, and should be relaxed and fluid.
Step 3: Creating the Rhythmic Sound The rhythmic sound of clawhammer banjo is created by striking the strings in a specific pattern. The most common pattern is the bum-ditty pattern, which involves striking the fifth string with your thumb followed by a downward strike with your middle finger and an upward strike with your index finger. This pattern creates a distinctive and driving rhythm that’s essential to clawhammer banjo.
Step 4: Varying Your Right Hand Technique Once you’ve mastered the basic bum-ditty pattern, it’s time to start varying your right hand technique. Experiment with different patterns, such as the drop-thumb technique, which involves using your thumb to strike the fifth string and then dropping it down to strike the other strings in a pattern. You can also experiment with double-thumbing, which involves using your thumb to strike the fifth string twice in quick succession.
Step 5: Practicing Regularly As with any instrument, practicing regularly is essential to mastering clawhammer banjo. Start by practicing the basic bum-ditty pattern for short periods of time and gradually increase the length of your practice sessions. Focus on developing a smooth and relaxed right hand technique, and experiment with different patterns to keep your playing fresh and interesting.
Step 6: Learning from Others One of the best ways to improve your clawhammer banjo technique is to learn from others. Seek out lessons from experienced teachers, attend workshops and festivals, and play with other musicians. Watching other players and getting feedback on your own playing can help you improve your technique and develop your own style.
In conclusion, learning basic right hand technique for clawhammer banjo takes time and dedication, but the rewards are well worth the effort. By following these steps, you’ll be well on your way to mastering this unique and exciting style of banjo playing. Remember to practice regularly, seek out opportunities to learn from others, and never stop experimenting with different techniques and patterns.
In this video by The Ozark Banjo Co. we show you everything you need to know about right hand technique for clawhammer Banjo. Great for beginners.
Video Text
0:00:01.1 –>
[Music] in this lesson I’m gonna teach the basic right hand technique that is the foundation for climber banjo playing this is a great lesson for someone that’s never played the banjo and is ready to get going or is an experienced banjo player and wants to improve their accuracy and speed let’s talk about how you’re holding your banjo I like to keep my banjo neck right about here not too low not too high just right if when where you’re sitting you think about your banjo pot as a face of a clock and the banjo neck is the needle you’d have nine o’clock ten o’clock eleven o’clock twelve o’clock I keep my banjo neck between nine and ten so right about here the angle of your banjo neck is gonna affect how you play your banjo with my banjo neck right about here I have a very straight relaxed wrist if my banjo
0:01:01.8 –>
neck was down here I would have to change my wrist angle and the way my hand attacks the string and this has tension I don’t want this tension in my plane if my banjo was way up here again I’d have this angle that’s unnatural so I like to keep my banjo neck just so you can keep your banjo between two legs maybe on one knee or on a strap secured let’s talk about your basic right hand technique let’s start off by relaxing your hand and getting it in a neutral position that’s tension free to me claw hammer is all about being tension free and relaxed so when your hand is neutral and in a relaxed position where is it at for me it’s not this straight as a board hand because look you see all this tension in my hand it’s not a fist you can see the tension in my hand again when it’s neutral in a relaxed state it
0:02:00. –>
makes a claw and this is the shape I’m looking for for claw hammer is this neutral position where I’m relaxed and it’s a claw shape hence the word claw hammer which is style we’re learning something to remember is that this is my relaxed neutral position for my right hand everyone’s a little different so your hand might be a little straighter or it might be a little more curved in when it’s in its neutral resting position now the goal is to get you playing in your neutral resting position if you have to modify it a little bit down the road that’s okay don’t worry now that your right hand is in a relaxed neutral claw shape it’s time to make some noise I want you to take either your index or your middle finger and put the back of your nail on top of the first string I want you to put your thumb on top of the fifth string this is your resting home position now that you’re in home position I want you to think of your right hand as knocking on the door the
0:03:00.2 –>
movement is gonna come from your wrists I want you to go up and then back down landing on that first string and thumb landing on the fifth string and you’re gonna roll through that first string making some noise so we’re gonna do it again I’m not gonna play my fifth string I’m just gonna let it land there now I want you to remember that my finger my thumb work as unit they go up together and they go down together landing at exactly the same time and everything is coming from this wrist motion so I go up I go down and I’ll land on that first string and roll through and the space for my finger and thumb is widening just a hair when I roll through I’m hitting the first string with the very middle of my fingernail when I go up to hit the first string I let the weight of my hand carry through the first string I’m not pushing
0:04:00.1 –>
through the first string I’m letting the weight of my hand do all the work because my right hand is relaxed notice I’m not flailing out my fingers I’m keeping my hand in a claw shape working as a unit my finger and my thumb are going to land on the fifth string and the first string at exactly the same time I can let my thumb dig into that fifth string even though I’m not playing it it can help to bounce your hand back up all of the movement is coming from my wrist it’s not coming from my forearm not to say I don’t move my forearm I just think of it more as a shock absorber since you’re hitting your first string with the back of your finger you’re going to want to grow out your nail so that you have a hard surface to help bring out the banjo now if you don’t want to grow out your nails there are other options you could take a banjo
0:05:00.5 –>
pick and put it on backwards from how the three finger players put it on so you have this surface barely sticking out to hit the string with or you could go to a nail salon and have fake nails or some people buy on those stick on nails I make a fake nail out of a ping-pong ball and I like it because I can just take it off if you’re having trouble keeping this claw shape here’s a trick you can take an old credit card and put it between your fingers and the palm of your hand and it’ll help keep this claw shape you can’t move your hand in and you also can’t loosen your hand or the credit card will fall out so look here cards in [Music] there you go let’s work on hitting your second string take the back of your fingernail and put it on top of the second string and thumb on top of the fifth string your hands going to go up like it’s
0:06:00.4 –>
knocking on the door and go back down rolling through that second string while thumb lands on the fifth string silently here’s a tip for all the banjo players who are trying to improve the right hand accuracy when I hit the second string my finger rolls through and then is physically stopped by the first string this has really helped me stay spatially aware of all of my strings you can apply this to the third string you’d be hitting the third string rolling through and being stopped by the second string same with the fourth we stopped by the third if you’re new to the banjo don’t worry about it just hit the string and see where it goes let’s work on hitting your third string take the back of your finger and put it on top of the third string and thumb on top of the fifth string your hands gonna go up like it’s knocking on the door and you’re gonna hit the third string on your down stroke
0:07:01.7 –>
it’s gonna roll through while the thumb lands on the fifth string silently well notice when I’m rolling through that third string it rolls through and is stopped by the second string let’s work on hitting your fourth string your fourth string is probably the hardest string to hit because the spacing between your finger and your thumb is so small so start off by putting the back of your nail on top of the fourth string and thumb on top of the fifth string you go up with your hand like you’re knocking on a door and then your hands going to roll through that fourth string stopping on the third string and the thumb is gonna land silently on the fifth at exactly the same time you may be asking yourself why is my thumb landing on the fifth string even if I’m not playing the fifth string
0:08:00.3 –>
well the reason why is it helps you stay spatially aware of where everything is at and connected to your banjo what you’re trying to do is learn the space between your finger and your thumb so your first string and your thumb has this much space the distance between your fourth string and your thumb is small it’s about this much so you’ve learned the space between your thumb and your finger so I can pinpoint where everything’s at 2nd 4th 1st my thumb wasn’t landing silently on my fifth string helping me to stay connected and spatially aware to where all my strings are at at all times my finger would be free-floating and I wouldn’t know where everything is at and I’d be using my forearm where my forearm is connected to my banjo pot to try and guess where everything is at and that’s a lot of room for error which is why I use my thumb to help pinpoint where
0:09:00.5 –>
everything is at at any point before you move on to the next step it’s time to practice all I need you to be able to do before going on to the next step is hitting the first string then you’re ready to move on but if you want to keep practicing move on to your second or your fourth or you can alternate you could go go on one and repeat or you can make it harder you could go first string and then third string or second string and then fourth string or 1st 3rd 2nd 4th
0:10:01.5 –>
you might consider practicing this exercise with the metronome I’ll hit the first string on the downbeat of the one two three and four so then I’ll move on to the second string [Music] I find it helps to subdivide the beat from quarter notes to ape one and two and three and four and that helps you keep better time one and two and three and four and let’s move on
0:11:03.1 –>
from our single string pattern and add in a thumb we’ll call this pattern index thumb earlier we were practicing just have a single string maybe your first second third or fourth and our thumb was landing on the fifth string quitely well it’s time for that to change we’re gonna let the fifth string ring out [Music] we’re going to start off by putting the back of our fingernail on top of the first string and your thumb resting on top of the fifth string this is your home position your hands going to go up like it’s about to knock on a door and then the way your hands going to go back down and your fingers going to roll through the first string thumb will catch on the fifth string and then roll off so you have this first five first five first five verbs five first five first what with my thumb rolls off the fifth string my thumb makes a little circle
0:12:00.6 –>
pattern kind of like this I’m over exaggerating but that’s what it’s doing some banjo players hit their fifth string and when they roll through they bend their thumb like this my thumb stays straight and rigid and just roll through it’s different for everyone there’s not a wrong to right answer half the banjo players I know in their thumb and the other half don’t so whatever works for you I want you to practice hitting your first and fifth straight for a while once you have this down you can move on to the second and fifth string the way to third and fifth with a fourth win then you can move on to alternating strings so you go first fifth second fifth pull third fifth fourth fifth and back to third second
0:13:00.2 –>
and first if you want to make it harder play your first fifth then third fifth then move on to your second fifth and fourth fifth I find it’s useful to practice this exercise with the metronome as well each beat is going to get two notes so you have one and two and three and four and one and two and three and four and and so on as I said earlier I find it’s useful to subdivide the beats from quarter notes to eighth notes one and two and three and three and four one
0:14:15.3 –>
three and four in it now you’re ready for the next right hand pattern in the banjo world this pattern is affectionately called the bum ditty I’m not joking it’s called the bum ditty because of its cadence bum diddy dum diddy dum diddy it’s a combination of the two patterns you already know the single string pattern and the index thumb pattern here it is one and two
0:15:00.2 –>
as I said earlier the bum ditty is a combination of the two patterns you already know the single string pattern where the thumb land silently and then the index thumb pattern where you hit the first string and the thumb rolls off the fit string each of these patterns will take up a full beat so you’ll have one and two and three and four and try and get the bum Diddy ingrained in your head the bum diddy dum diddy bum bum baby you could also think of it as long short short long short short long short short because you have a long note and then the second note we subdivide it’s a long short short long short short
0:16:01.2 –>
once you can do the bum ditty on one string you can move on to your second string [Music] if you’re practicing with the metronome this is what it will look like single string index thumb single string index thumb bum diddy dum diddy so or one yeah
0:17:02.4 –>
now you’re ready for your brush stroke your brush stroke is when you hit your fourth third second and first string all in one downward motion with the back of your fingernail [Music] notice that my thumb is gonna catch on the fifth string silently my thumb lands on that fifth string just as my finger hits the fourth string also notice that this is not like knocking on a door I’m actually going to engage my forearm and it’s gonna go side to side a bit it’s a little bit of both it’s a little bit of knocking and moving your forearm [Music] once you have your brush thrown down trying gauging your fit straight and letting it ring now we’re at the end of
0:18:07.5 –>
our lesson and we have one exercise left to go we’re going to take our bum Diddy exercise and add in our brush thumb stroke so we’ll take our single string index thumb single string and mix them and we’ll substitute the index thumb for a brush thumb stroke so we’ll have single string brush thumb single string brush straight brush [Music] so I want you to practice this on every string starting with the first string first string strung top four strings strung top and second [Music]
0:19:04.3 –>
let’s talk about the bum ditty pattern before we quit and hang everything up this right hand exercise is the most important exercise for you to practice because it is the foundation of clawhammer basically what’s going on is you have melody then rhythm melody from top melody strong top so we have melody in there and the rhythm it serves two purposes it’s almost like you have a fiddle or playing the melody and the guitar player playing the rhythm you have melody stroke or leave that strum and do the index on melody rhythm melody so if you think about this first note being the melody and then having the rhythm afterwards watch what you can do with just this one pattern over and over [Music]
0:20:05.3 –>
my right hand is doing the same thing over I’m just moving my left hand onto different notes [Music] that’s why it’s so important that you get this right hand pattern down because you don’t want to think about your right hand you want to just know it cold you want to be able to go bum didn’t even not thinking about it that way you can focus on your left hand playing those notes and doing those hammer ons and slides and making the melody note ring I learned the banjo from My Father he has a very strict role you’re not allowed to learn your first tune until you can play your bum ditty for one minute without messing up doesn’t matter how slow or how fast just one minute without messing up most tunes
0:21:02.8 –>
take about a minute to play so his reasoning is if you could play the bum ditty one minute without messing up you’re ready and you can start focusing on the left hand and let the right hand just do its job I practice my bum Duty for about a month before I moved on to my first tune everyone learns at their own speed some people pick it up in a day some people pick it up in a week or even a month it’s okay go at your own speed I hope you enjoyed this lesson and you come back for your first two thanks